CAGED Minor Scales: Completing the CAGED System, Part 4
For tabs and diagrams, grab the free lesson pack for this lesson.
Introduction
In the first three parts of this series, we worked through the minor CAGED chord shapes, the arpeggios, and minor pentatonic scales. Now, we’re going to complete the minor CAGED system by expanding out to the full minor scale.
We’ll take the same approach we’ve used throughout this series. We’ll build the scale patterns, and then we’ll work on getting them anchored to the fretboard through the root notes. That way, you’ll be able to see them all over the neck.
Once again, I have a free lesson pack in the description that contains the diagrams and tabs for this lesson. Be sure to grab that and reference it as needed as we work through the minor scales.
Building the Minor Scales
To build the minor scale patterns, we just need to add two notes to the minor pentatonic patterns we learned in the previous lesson.
The minor scale is basically just an extension of the minor pentatonic scale, so keep this in mind as you work through the minor scales and start to see the connection between the two.
We’re going to start in the C minor shape and work our way up the fretboard through each of the minor CAGED positions.
C Minor Shape
Starting with C minor and working from the sixth string across to the first string, we have notes on frets 1, 3, and 4.
Moving across to the fifth string, we have notes on frets 1 and 3.
On the fourth string, we have the open string, fret 1, and fret 3.
On the third string, we have the open string, fret 1, and fret 3.
On the second string, we have frets 1, 3, and 4.
On the first string, we have the same pattern: frets 1, 3, and 4.
Putting it all together and starting from the root note on the fifth string, we have the C minor shape scale pattern.
A Minor Shape
Moving up to the A minor shape and starting from the sixth string, we have notes on frets 3, 4, and 6.
On the fifth string, we have frets 3, 5, and 6.
On the fourth string, we have frets 3, 5, and 6.
On the third string, we have frets 3 and 5.
On the second string, we have frets 3, 4, and 6.
On the first string, we have frets 3, 4, and 6.
Putting it together and working from the root note on the fifth string, we have the A minor shape scale pattern.
G Minor Shape
Moving up to the G minor shape and working from the sixth string across, we have frets 4, 6, and 8.
On the fifth string, we have frets 5, 6, and 8.
On the fourth string, we have frets 5, 6, and 8.
When we get over to the third string, we get a little bit of a pattern change. We have frets 5, 7, and 8.
Moving across to the second string, we’re going to shift down a little bit and grab frets 6, 8, and 9.
On the first string, we have frets 6 and 8.
Putting it all together and working from the root on the sixth string, we have the G minor shape scale pattern.
E Minor Shape
Moving up to the E minor shape and starting on the sixth string, we have notes on frets 8, 10, and 11.
On the fifth string, we have frets 8, 10, and 11.
On the fourth string, we have frets 8 and 10.
On the third string, we have frets 7, 8, and 10.
Moving over to the second string, we have frets 8, 9, and 11.
On the sixth string, we have frets 8, 10, and 11.
Putting it together from the root note on the sixth string, we have the E minor shape scale pattern.
D Minor Shape
Moving up to the D minor shape and starting from the sixth string, we have notes on frets 10, 11, and 13.
Moving across to the fifth string, we have notes on frets 10, 11, and 13.
On the fourth string, we have frets 10, 12, and 13.
On the third string, we have frets 10, 12, and 13.
Moving across to the second string, we have frets 11 and 13.
On the first string, we have frets 10, 11, and 13.
Putting it together and working from the root note on the fourth string, we have the D minor shape scale pattern.
We now have the full minor scale mapped across all five minor CAGED positions. Next, let’s work on building the chord/scale relationships.
Chord/Scale Relationships
For this first exercise, we’re going to build the relationship between the minor CAGED chord shape and the minor scale.
We’ll play the chord first and then put the full minor scale around it.
Starting with the C minor shape, we’ll then move up through the A minor shape, G minor shape, E minor shape, and D minor shape.
Root Note Anchoring
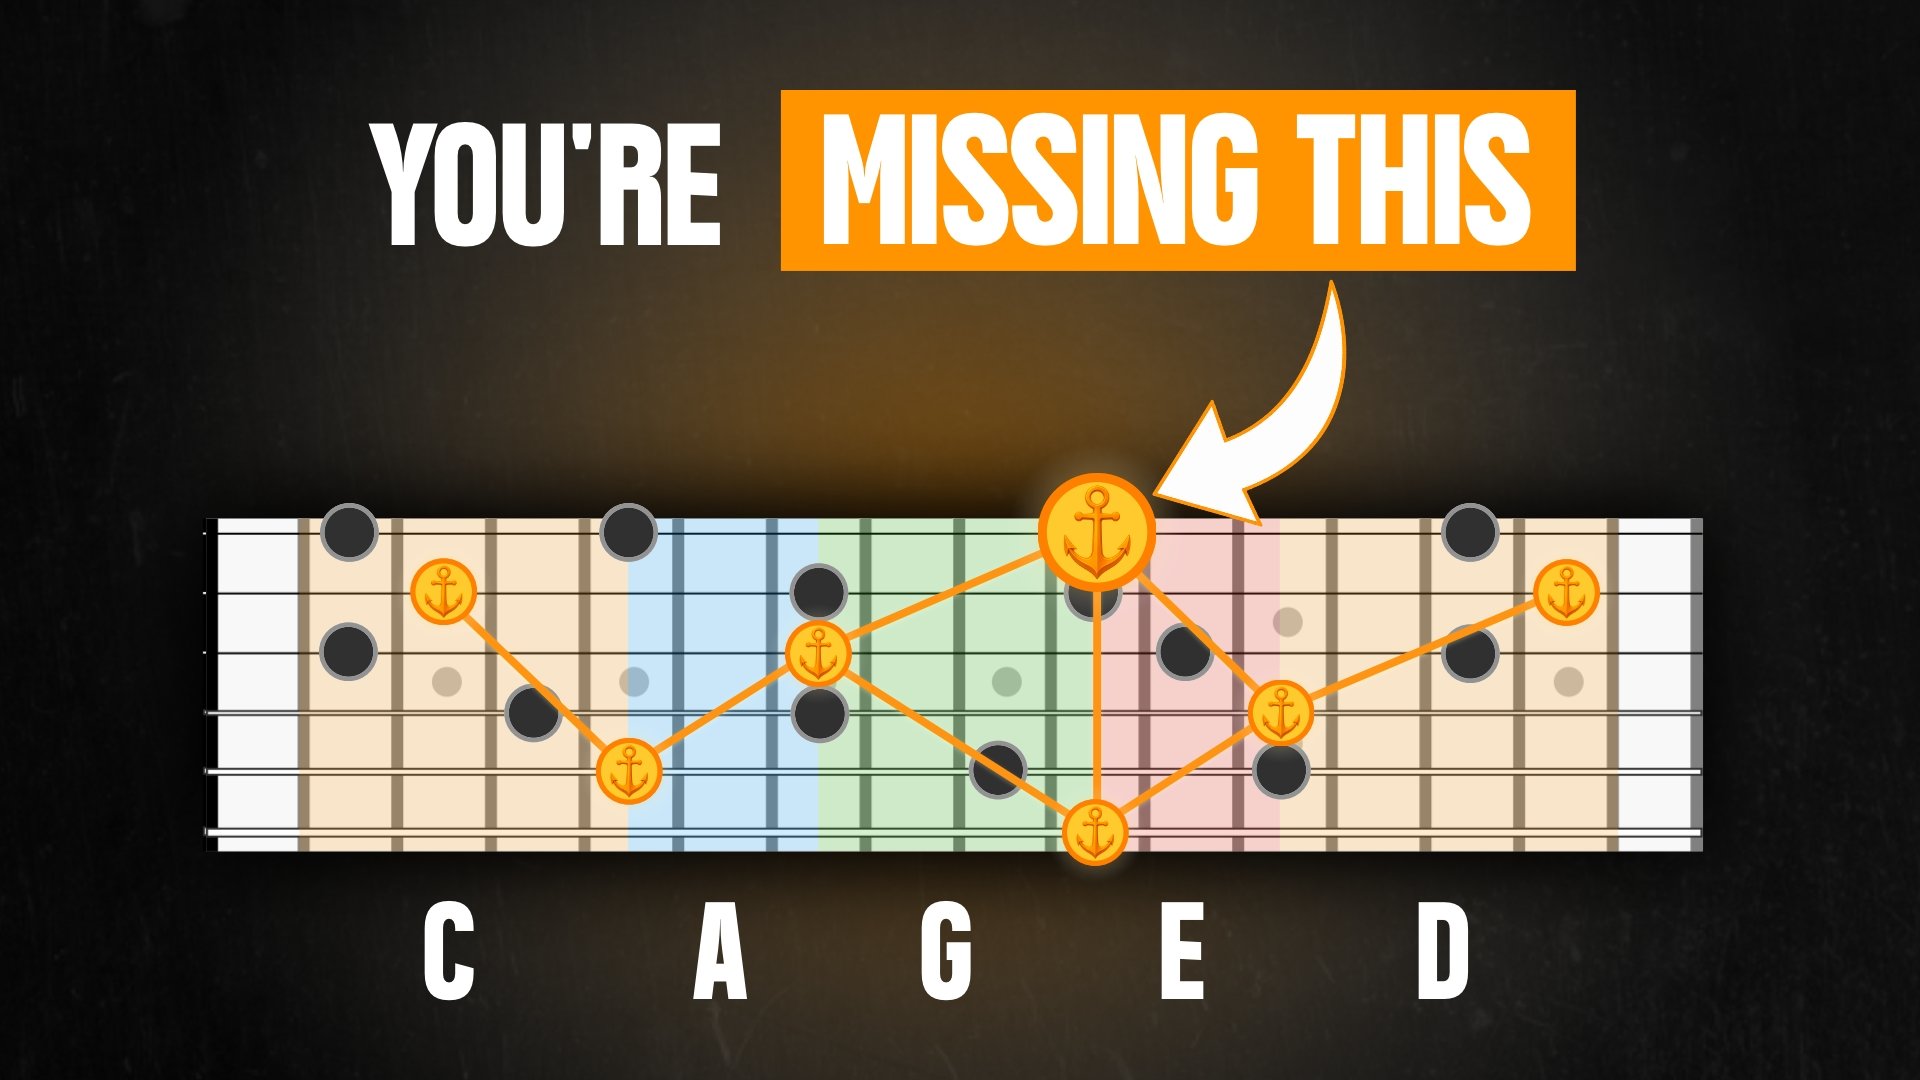
Now we’re going to go back to the root note anchoring exercise we used in the previous lessons in this series.
We’ll work through the root notes of each position, play the root note, and then play the full minor scale pattern that’s attached to that root.
These types of exercises are what’s going to help take you from knowing your scale shapes to actually being able to see them anywhere on the fretboard.
Starting with the C minor shape and working our way up through each of the CAGED positions, we’ll start with the root note on the second string and then the root note on the fifth string.
Moving up to the A minor shape, we’ll start with the root note on the fifth string and then the root note on the third string.
Moving up to the G minor shape, we’ll start with the root note on the sixth string, then work from the root note on the third string, and finally the root note on the first string.
Moving up to the E minor shape, we’ll start with the root note on the sixth string, then the root note on the fourth string, and then the root note on the first string.
Moving up to the D minor shape, we’ll start with the root note on the fourth string and then the root note on the second string.
At the C minor octave shape, we’ll start with the root note on the second string and then the root note on the fifth string.
Now we’re going to take this exercise and work it back down to the open C minor shape.
Starting from the C minor octave shape, we’ll begin with the root note on the fifth string and then the root note on the second string.
Moving back down to the D minor shape, we’ll start with the root note on the second string and then the root note on the fourth string.
At the E minor shape, we’ll start with the root note on the sixth string, then the root note on the fourth string, and then the root note on the first string.
Moving back down to the G minor shape, we’ll start with the root note on the sixth string, then the root note on the third string, and finally the root note on the first string.
Back down at the A minor shape, we’ll start with the root note on the third string and then the root note on the fifth string.
Finally, we’ll return to the open C minor shape, starting with the root note on the fifth string and then the root note on the second string.
To get the most out of this exercise, you’ll want to repeat it starting from each of the minor CAGED shapes.
This will get you out of just learning a single sequence up the fretboard and force you to work position by position to put the scale shape around those root notes.
Next Steps
So now we’ve completed the minor side of the CAGED system, connecting the chord shapes to arpeggios, pentatonics, and the full minor scale across the fretboard.
From here, keep working on anchoring these shapes to those root notes. The more familiar those relationships become, the easier it’s going to be to find and connect them anywhere on the neck.
If you want some additional practice, I have Practice Blueprints for all four lessons inside The Workshop on Patreon.
Don’t forget to grab the free lesson pack for this lesson, and I’ll see you in the next one.

Lesson Pack: YT-002-P4 - CAGED Minor Scales: Completing the CAGED System, Part 4
Download the lesson pack for this lesson: